Learning textures and making dice.
This week during the course we completed our Mjolnir Hammers and submitted them, we then started to learn textures in Maya. We first tried it with a basic cube and the teacher showed us using UV Editor how to import the image onto the cube.
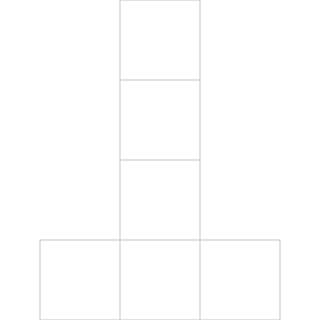
Using a UV map as shown above we are able to see all sides of the cube flat. We then put the image onto Photoshop and edited the image into each square.
also we were taught blinn textures and how to make things transparent using a dice and building. it was hard to follow when making the building due to trying to get the textures to line up to the uv map in photoshop.
We then used this as a texture in Maya to get the finished product.
Using these skills we have learnt we were given a task to create a crate using textures. Although we have to make the box 3D in addition.
On Tuesday we had a extra lesson to make the crate.
we used the uv map to add the texture and then to make it 3D added in a cube and reshaped it to the size of the boards across the box and then texture them.i would have like to these done a more complicated box but i did not have the time.also we were taught blinn textures and how to make things transparent using a dice and building. it was hard to follow when making the building due to trying to get the textures to line up to the uv map in photoshop.
the building map was much different than a regular cube so i had to keep checking which side was which in case the roof ended up on the side. i could not make the windows have a reflection in time but i am relieved on how it turned out.
The dice wasnt too hard it was a basic cube shape except i had to rearrange the texture to fit the UV map
one the texture was added we had to select the dots only and remove the background, this will help the dots become transparent on the dice in maya. the image had to be flattened however for it to show up otherwise you will see no difference.


Comments
Post a Comment